Picture hanging strips can hold a frame neatly against a wall, but the first click is not the end of installation. Choosing the correct product, preparing both contact surfaces, reinforcing the wall strips, and waiting before rehanging all matter. Removal is another separate operation: separating the frame from the wall strips is different from stretching the adhesive off the wall.
This guide follows the small and large picture hanging strip instructions in a Command manufacturer instruction sheet hosted by Home Depot. The sheet also contains instructions for hooks, so read the section labeled Small & Large Picture Hanging Strips. Follow the current package for your exact product if its limits or steps differ.
Check the frame, the location, and the exact strip package
Start with the complete frame you intend to hang, including its glass or acrylic cover and backing. Weigh that assembly, then compare its weight and dimensions with the limits on your package. Do not borrow a capacity from another strip size, a different product, or an older instruction sheet. The required number and placement of pairs must come from the diagram for the product you bought.
A pair means two interlocking strips pressed together. That distinction matters when the package describes pairs rather than individual strips. Lay out the required parts before exposing any adhesive. If the package specifies a placement pattern that your frame cannot accommodate, choose a different suitable hanging system rather than moving the strips wherever they happen to fit.
The cited instructions say not to hang over beds, on wallpaper, or with valuable or irreplaceable items. They also say not to apply strips to soft surfaces on the frame and specify indoor use from 50 to 105 degrees Fahrenheit. An inexpensive reproduction and a replaceable family-photo print are different decisions from an original painting or heirloom. Check your package for all surface exclusions; an unknown wall finish is a reason to ask the manufacturer before proceeding.
Plan the position before you expose the adhesive
Choose the frame position with a paper template or by having someone hold the frame while you view it from across the room. This planning stage is especially useful for a group. Our gallery wall layout guide covers arranging the composition before installation; the strip instructions determine how each suitable frame is attached.
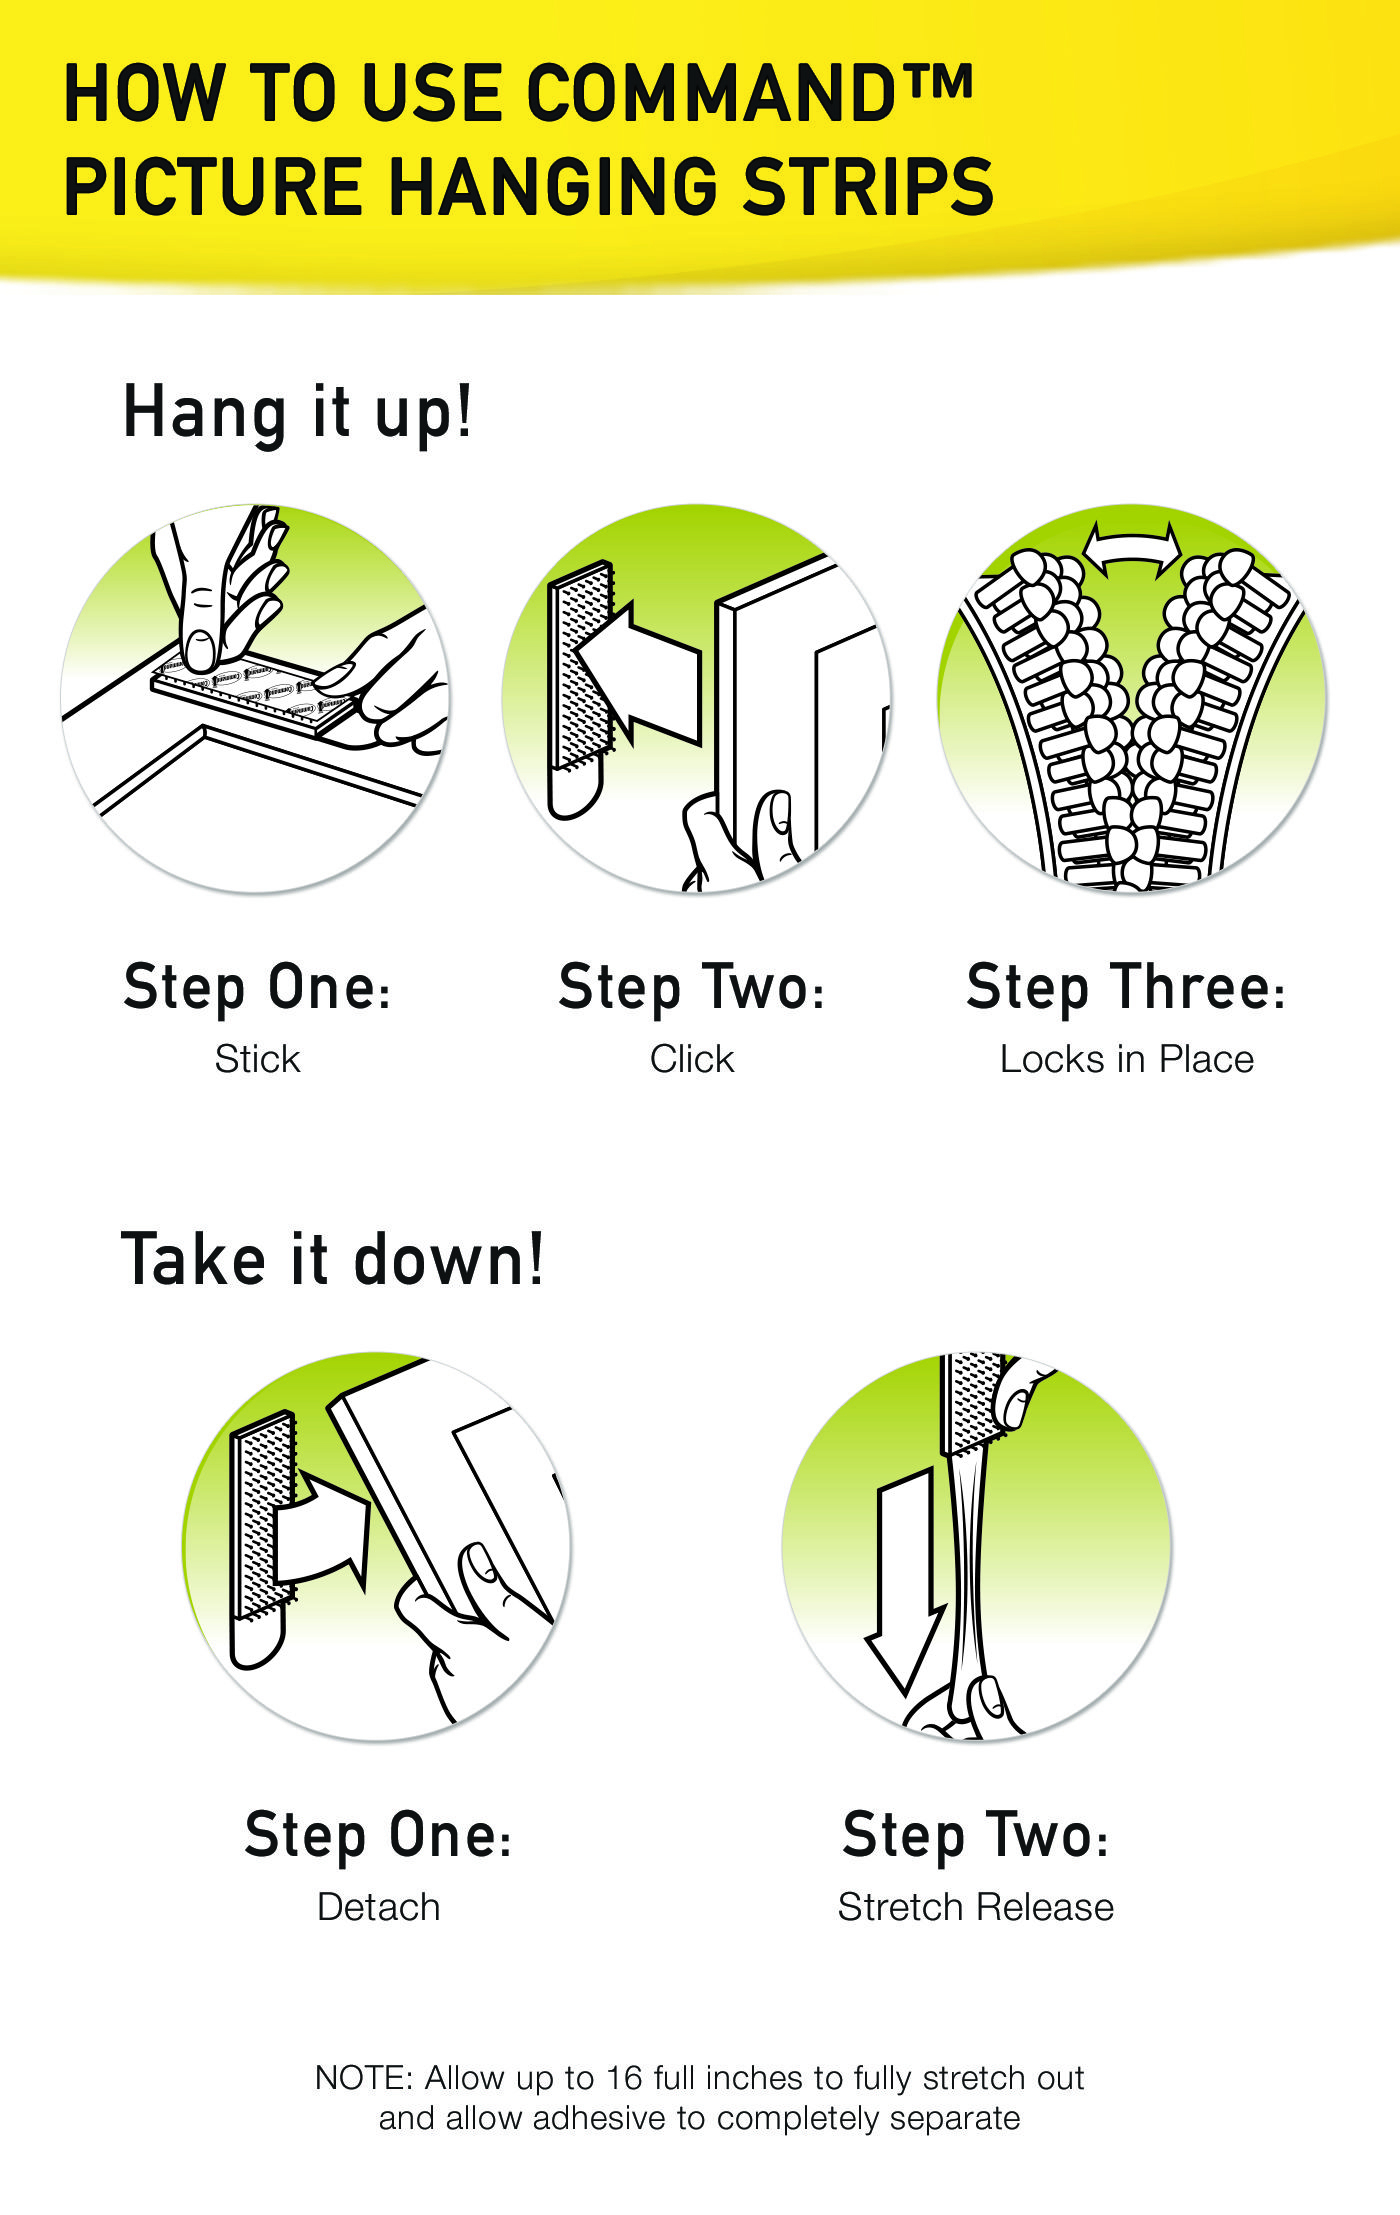
Think about future removal while selecting the spot. The release tabs need space for the downward stretching motion shown in the instructions. A frame squeezed immediately above a deep shelf may be convenient to display but awkward to remove. Check access before committing to the adhesive location, and keep the removal directions with your spare strips.
Inspect the back of the frame as carefully as the wall. The manufacturer sheet says to remove the hanging hardware from the back. Use the frame’s suitable contact areas, following the package diagram; do not place adhesive on soft backing material simply because it offers a larger area. If hardware cannot be removed without damaging the frame, ask the frame or strip manufacturer about an appropriate alternative.
Prepare the wall and click the pairs together
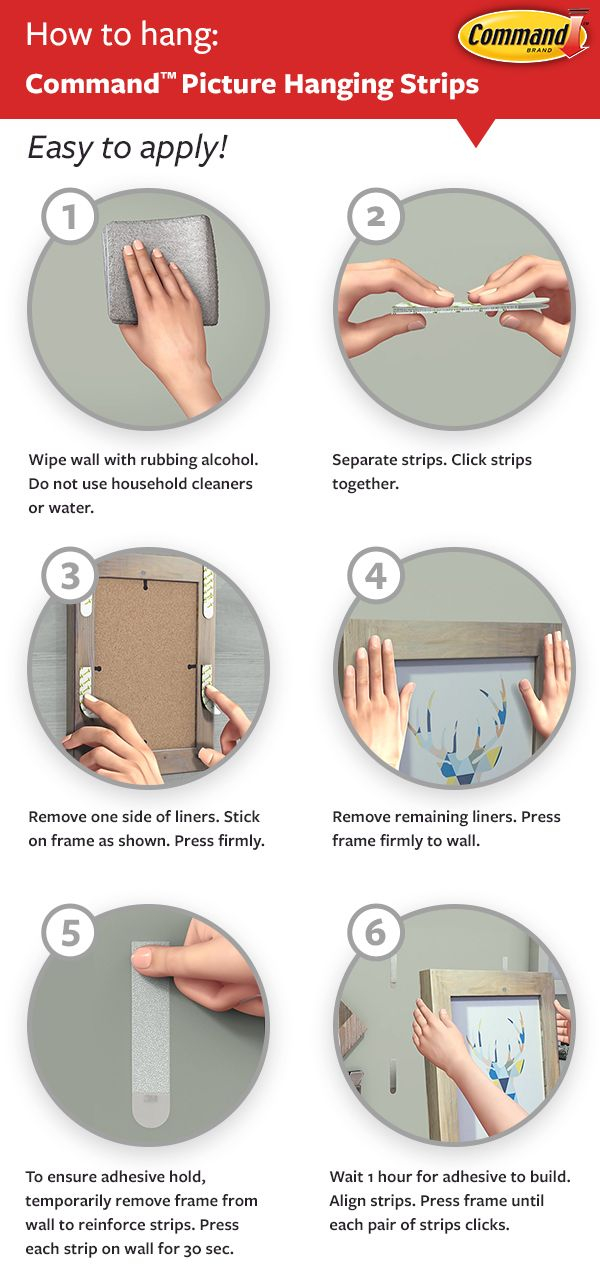
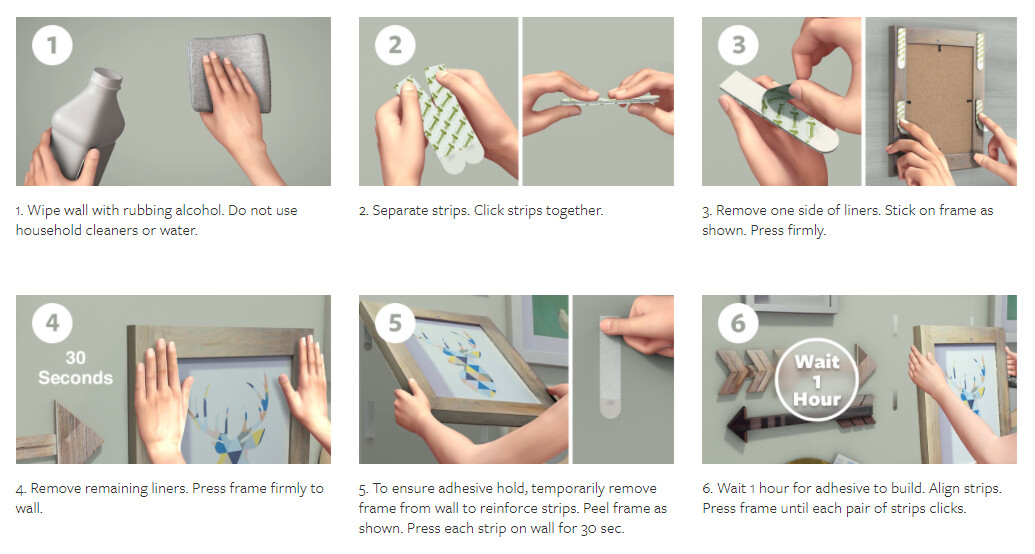
The sheet directs you to clean the wall with rubbing alcohol and not to use household cleaners. Prepare the location as directed on your current package, and allow it to dry before applying adhesive. Do not substitute a scented cleaning spray or assume that a recently wiped wall is ready. If the wall coating cannot tolerate the specified cleaning method, resolve that conflict before using the strips.
Fresh paint needs a separate check. The instruction sheet says to wait seven days after painting before use. Also follow the paint maker’s cure directions and the current strip package; a surface that feels dry is not permission to shorten either manufacturer’s waiting requirement. There is little benefit in saving a few days if the finish is not ready for attachment and eventual removal.
Separate the strips and press two together until they click. Remove the liners from one side of each assembled pair, place the pairs on the frame as the package shows, and press firmly. Keep track of which liners remain so you do not expose the wall-facing adhesive before the frame is ready to position.
Press, separate, reinforce, and wait before rehanging
For the small and large strips in the cited sheet, remove the remaining liners and press the frame to the wall. Press each side firmly for thirty seconds. Support the frame as you work rather than assuming the first contact means installation is complete.
Next, temporarily remove the frame to reinforce the adhesive on the wall. The sheet tells you to grasp the bottom corners and peel the frame away; do not pull it straight off. This separates the interlocking pairs while leaving the wall strips in place. Press each wall strip firmly for thirty seconds. Follow the package’s illustrated movement carefully, especially if you have not used this style before.
Wait one hour before reattaching the frame under this instruction sequence. Set a timer and leave the frame safely elsewhere during the wait. Then align the pairs and press until each pair clicks together. The waiting stage occurs after reinforcing the wall strips; spending an hour arranging photographs beforehand does not replace it. If your exact product has different directions, use those directions throughout instead of mixing steps from several products.
Remove the frame first, then stretch each wall strip downward
When it is time to redecorate, begin by separating the frame from the interlocking wall strips using the illustrated bottom-corner peeling motion. Put the frame down securely. The adhesive removal step comes afterward, with the wall strips exposed and their tabs accessible.
The manufacturer sheet says never to pull the strip toward you. Pull straight down, slowly, against the wall, stretching it at least fifteen inches to release. That is a stretching motion along the wall, not a short outward tug. Give yourself room to complete it and follow the instructions on the current package. If a tab breaks or you cannot perform the stated removal method, stop and consult the manufacturer’s directions for that situation rather than prying the strip away.
Keep the package until the display comes down, and label any saved instructions so they stay with the correct product. A successful installation includes a suitable frame, a permitted location, the full pressing and waiting sequence, and a workable removal path. Check those details before hanging, and you can enjoy the arrangement without having to improvise the important steps later.